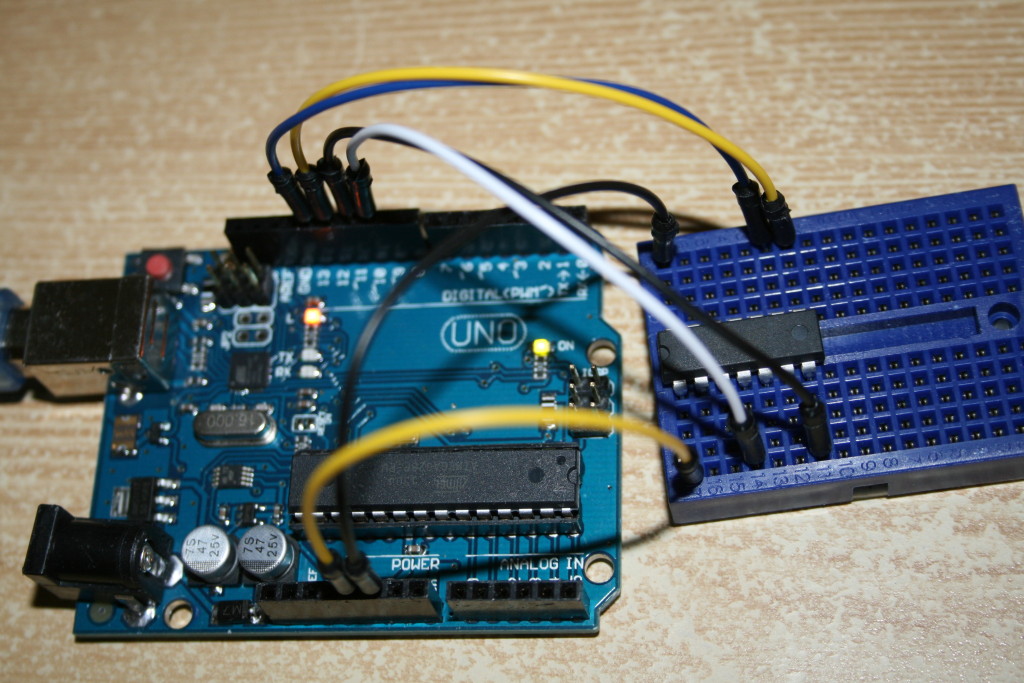
Vor einiger Zeit habe ich mir einen Arduino UNO angeschafft, quasi als Erweiterung des Sortiments an Testumgebungen. Der Arduino UNO verfügt über einen Atmel ATMega328P, entsprechende Steckleisten für die I/O-Pins und einen USB-Anschluss. Das Board kann so praktischerweise unter Windows direkt erkannt und sofort mit z.B. Arduino IDE verwendet werden. Ausserdem kann man perfekt über eine bereits eingerichtete serielle Verbindung auf der Konsole Feedback zum Debuggen bekommen, auch nicht ganz unpraktisch. Der Preis war mit 6,- Euro inkl. Versand sehr pasabel.
Nun kann man dieses Board nicht nur selbst programmieren und die Schnittstellen nutzen, sondern man kann es auch zu einem Programmer machen und so weitere µCs flashen. Dazu sind nur wenige Schritte nötig, wesentlich einfacher als beim Raspberry Pi.
1. Zuerst einmal muss man sich die Core-Definitionen für die ATTiny-Mikrokontroller runterladen: Hier (Je nach Version der Arduino IDE entsprechendes Archiv runterladen)
In dem Archiv sind unter anderem die beiden Verzeichnisse “cores” und “bootloader” sowie die Datei “Prospective Boards.txt” enthalten, die man in das Installationsverzeichnis der Arduino IDE entpackt: \Arduino\hardware\tiny
Wenn es den Verzeichnispfad noch nicht gibt, einfach erstellen. Jetzt öffnet man die Textdatei mit den Boarddefinitionen und kopiert folgenden Teil in die Datei “boards.txt” im tiny-Verzeichnis:
|
1 2 3 4 5 6 7 8 9 10 11 12 13 14 15 16 17 18 19 20 21 22 23 24 25 26 27 28 29 30 31 32 33 34 35 36 37 38 39 40 41 42 43 44 45 46 47 48 49 50 51 52 53 54 55 56 57 58 59 60 |
attiny84at8.name=ATtiny84 @ 8 MHz (internal oscillator; BOD disabled) # The following do NOT work... # attiny84at8.upload.using=avrispv2 # attiny84at8.upload.using=Pololu USB AVR Programmer # The following DO work (pick one)... attiny84at8.upload.using=arduino:arduinoisp # attiny84at8.upload.protocol=avrispv2 # attiny84at8.upload.using=pololu attiny84at8.upload.maximum_size=8192 # Default clock (slowly rising power; long delay to clock; 8 MHz internal) # Int. RC Osc. 8 MHz; Start-up time PWRDWN/RESET: 6 CK/14 CK + 64 ms; [CKSEL=0010 SUT=10]; default value # Brown-out detection disabled; [BODLEVEL=111] # Preserve EEPROM memory through the Chip Erase cycle; [EESAVE=0] attiny84at8.bootloader.low_fuses=0xE2 attiny84at8.bootloader.high_fuses=0xD7 attiny84at8.bootloader.extended_fuses=0xFF attiny84at8.bootloader.path=empty attiny84at8.bootloader.file=empty84at8.hex attiny84at8.build.mcu=attiny84 attiny84at8.build.f_cpu=8000000L attiny84at8.build.core=tiny ########################################################################### attiny84at1.name=ATtiny84 @ 1 MHz (internal oscillator; BOD disabled) # The following do NOT work... # attiny84at1.upload.using=avrispv2 # attiny84at1.upload.using=Pololu USB AVR Programmer # The following DO work (pick one)... attiny84at1.upload.using=arduino:arduinoisp # attiny84at1.upload.protocol=avrispv2 # attiny84at1.upload.using=pololu attiny84at1.upload.maximum_size=8192 # Default clock (slowly rising power; long delay to clock; 8 MHz internal; divide clock by 8) # Int. RC Osc. 8 MHz; Start-up time PWRDWN/RESET: 6 CK/14 CK + 64 ms; [CKSEL=0010 SUT=10]; default value # Divide clock by 8 internally; [CKDIV8=0] # Brown-out detection disabled; [BODLEVEL=111] # Preserve EEPROM memory through the Chip Erase cycle; [EESAVE=0] attiny84at1.bootloader.low_fuses=0x62 attiny84at1.bootloader.high_fuses=0xD7 attiny84at1.bootloader.extended_fuses=0xFF attiny84at1.bootloader.path=empty attiny84at1.bootloader.file=empty84at1.hex attiny84at1.build.mcu=attiny84 attiny84at1.build.f_cpu=1000000L attiny84at1.build.core=tiny ########################################################################### |
2. ATTiny84 mit dem Arduino UNO verbinden:
Dafür muss man die folgende Verkabelung benutzen, am besten auf einem Breadboard aufbauen.
| Arduino UNO | ATTiny84 | Funktion |
|---|---|---|
| 5V | 1 | VCC+ |
| GND | 14 | GND- |
| 10 | 4 | Reset |
| 11 | 7 | MOSI |
| 12 | 8 | MISO |
| 13 | 9 | SCK |
3. Als nächstes muss man den Arduino UNO als Programmer einrichten. Praktischerweise gibt es dafür einen Sample-Code. Zu finden unter Datei -> Beispiele -> ArduinoISP.
Dieses Beispiel lädt man, wählt unter Tools -> Board den Arduino UNO aus und als Programer den AVR ISP. Jetzt kann man das Programm auf den Arduino laden. Wenn alles glatt läuft, liefert die Arduino IDE keine Fehlermeldung.
4. Als nächstes wählen wir nun über Boards den ATTiny84 (internal 8 MHz clock) und unter Programer den Arduino as ISP.
5. Fertig! Jetzt können wir beliebige Programme auf den ATTiny84 flashen.


